Sync your Outlook work calendar to iPhone and Google Calendar
Contents
Many companies only allow you to sync your work calendar to your phone or other personal devices if those devices are enrolled in their management systems, such as Intune or other MDM (mobile device management) solutions. In practice, simply being able to see when you have a work meeting or call on your iPhone could mean giving your employer almost complete control over your device.
If, like me, you’re not comfortable with that, the alternatives aren’t particularly practical: taking screenshots of your work computer, creating events manually in your personal calendar, or opening Outlook every time you need to check something.
That’s where Calendar Liberator comes in. It’s a free, open-source browser extension I’ve built for Chrome, Edge, and Firefox. It lets you bring your work calendar to your iPhone, Google Calendar, or any other personal device. It reads your events from Outlook on the web and exports them as a standard .ics file, the format used by calendar apps. It also supports publishing to private URLs or endpoints, so your personal devices can download the latest version of the calendar directly from the address you provide.
In this article, we’ll look at how the extension works, what its limitations are, and why some seemingly simpler solutions don’t work. I’ll also walk you through publishing the calendar with Cloudflare Workers and R2, which may be a little complicated if you don’t have any experience with Cloudflare, although other options are on the way.
NOTE: Calendar Liberator exports in one direction only. It analyzes Outlook’s interface (UI) and generates an .ics file without ever modifying the original calendar. It does not sync both ways. To accept an invitation, move or delete a meeting, you still need to use Outlook on your work device.
The result
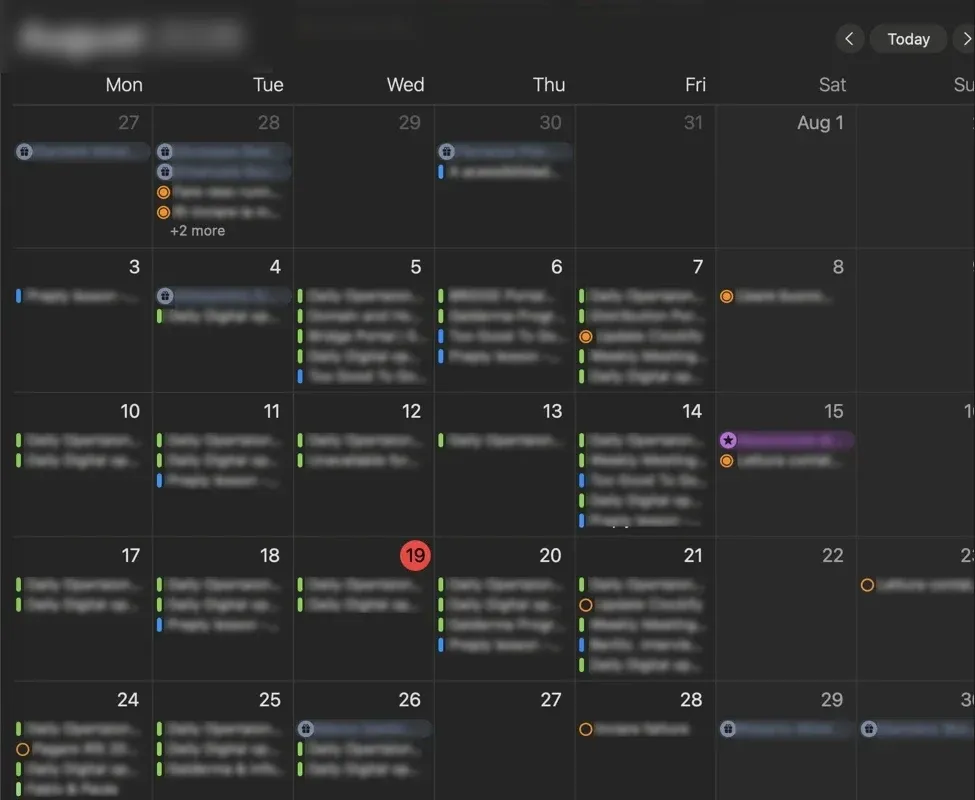
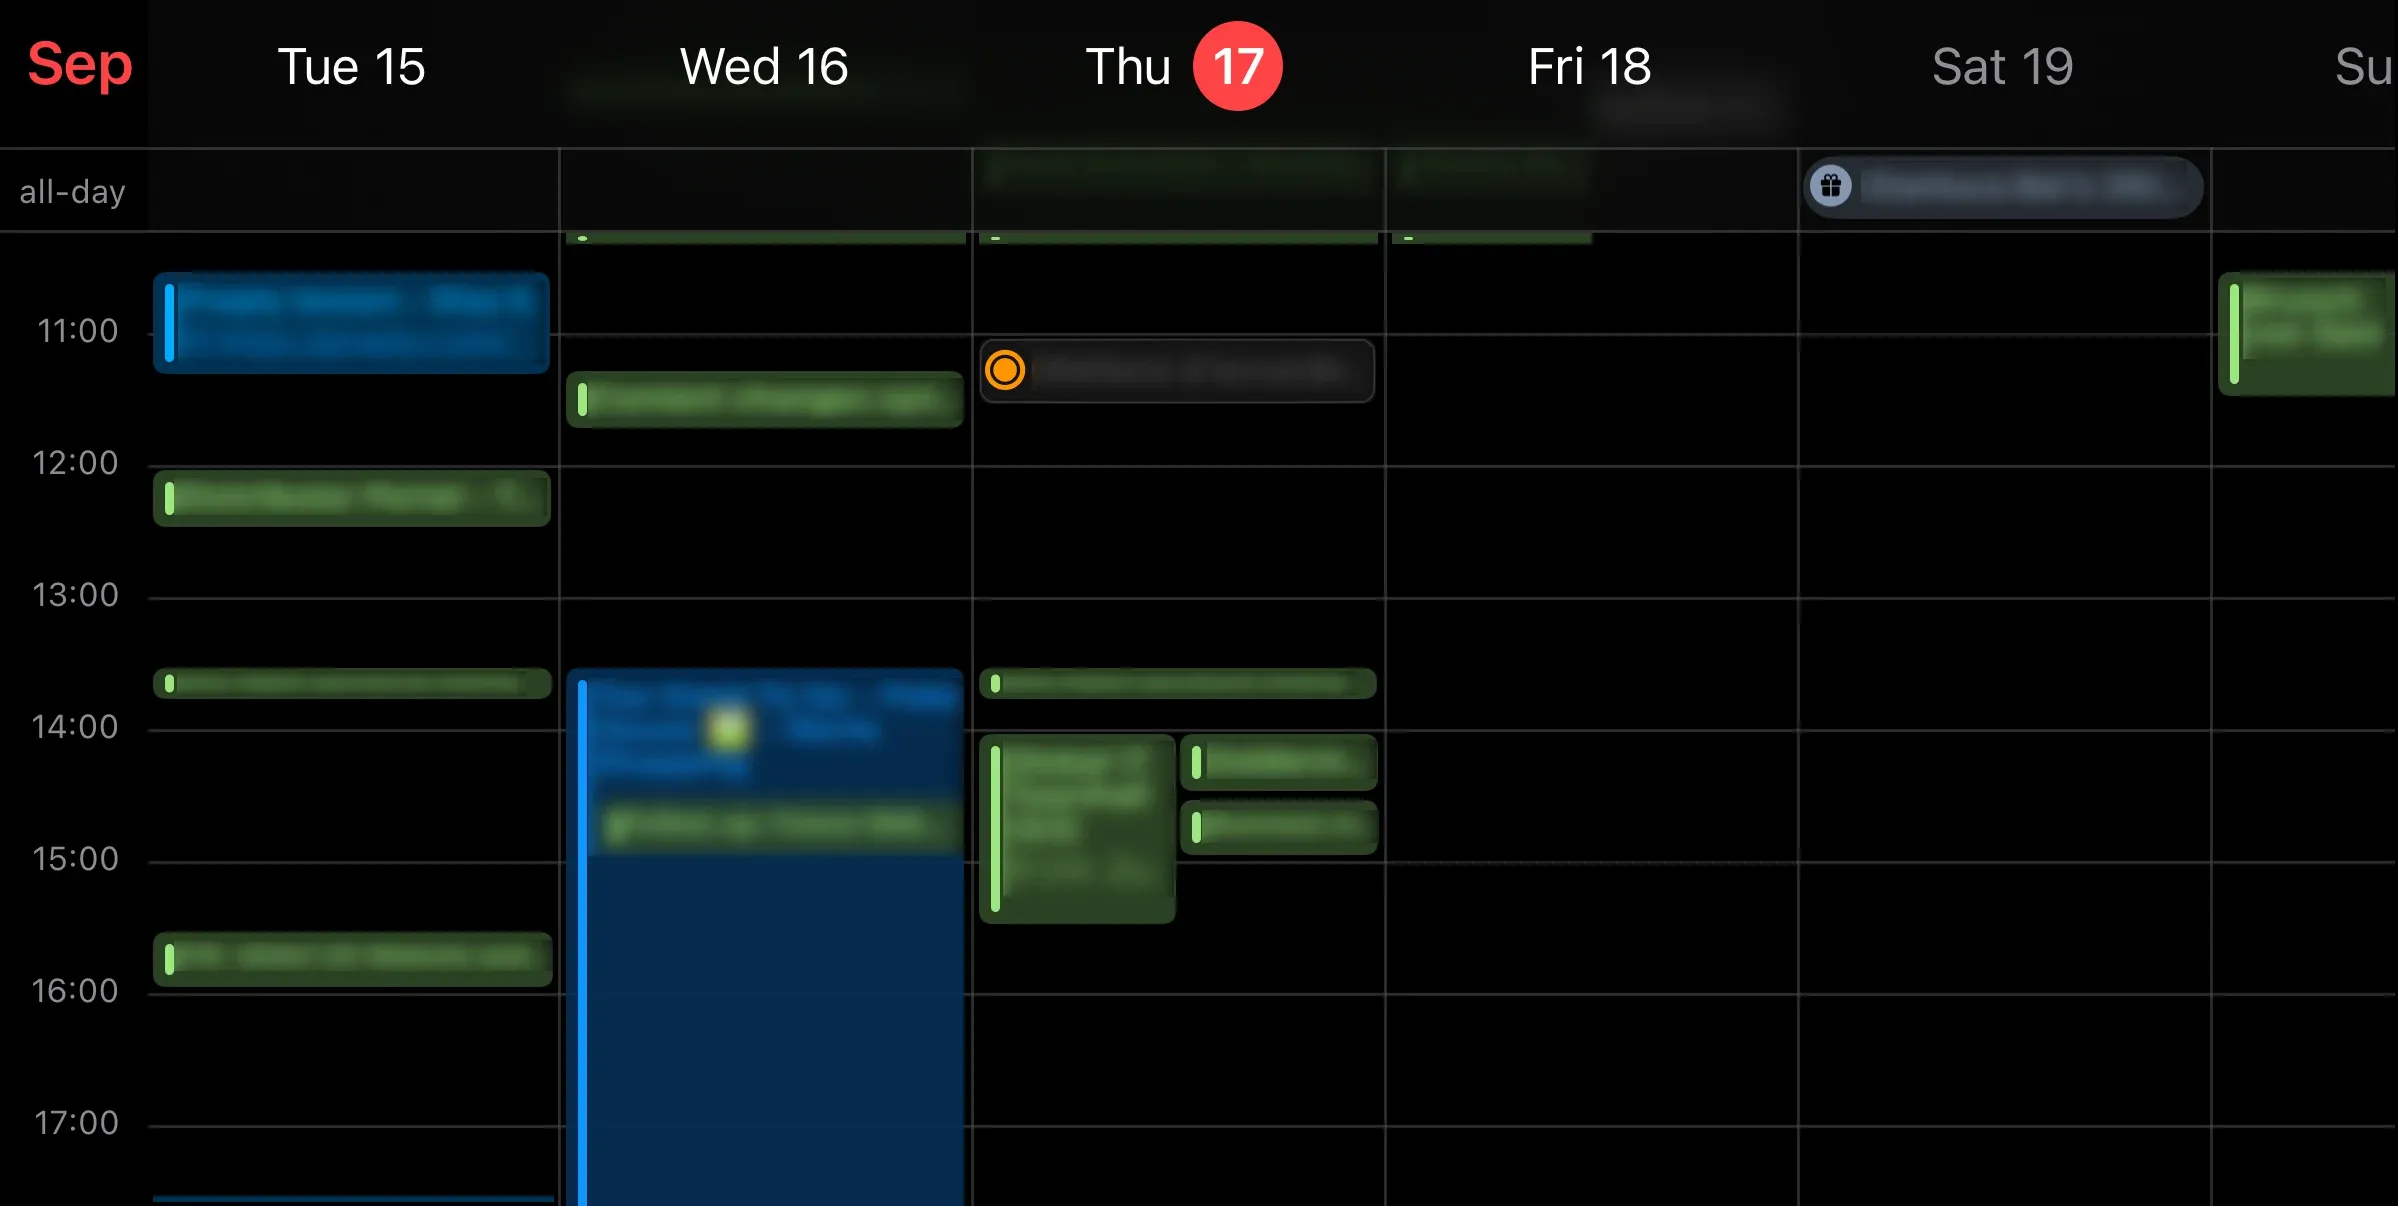
Open Outlook in your browser, click the extension, and you get an .ics file containing your work events, calls, and meetings. You can import it into the macOS Calendar app, see it on your iPhone alongside your personal appointments, or add it to Google Calendar as a separate calendar.
If you configure publishing to a private URL or endpoint instead, the extension updates the file at the address you’ve configured, and your calendars can then update automatically.
How Calendar Liberator works
It reads what you see in the browser
Calendar Liberator does not use Microsoft’s APIs, does not require OAuth, does not ask for your password, does not notify your company, and does not send your data to a server. It reads the calendar grid exactly as Outlook displays it on the page, using the browser session you’re already signed into.
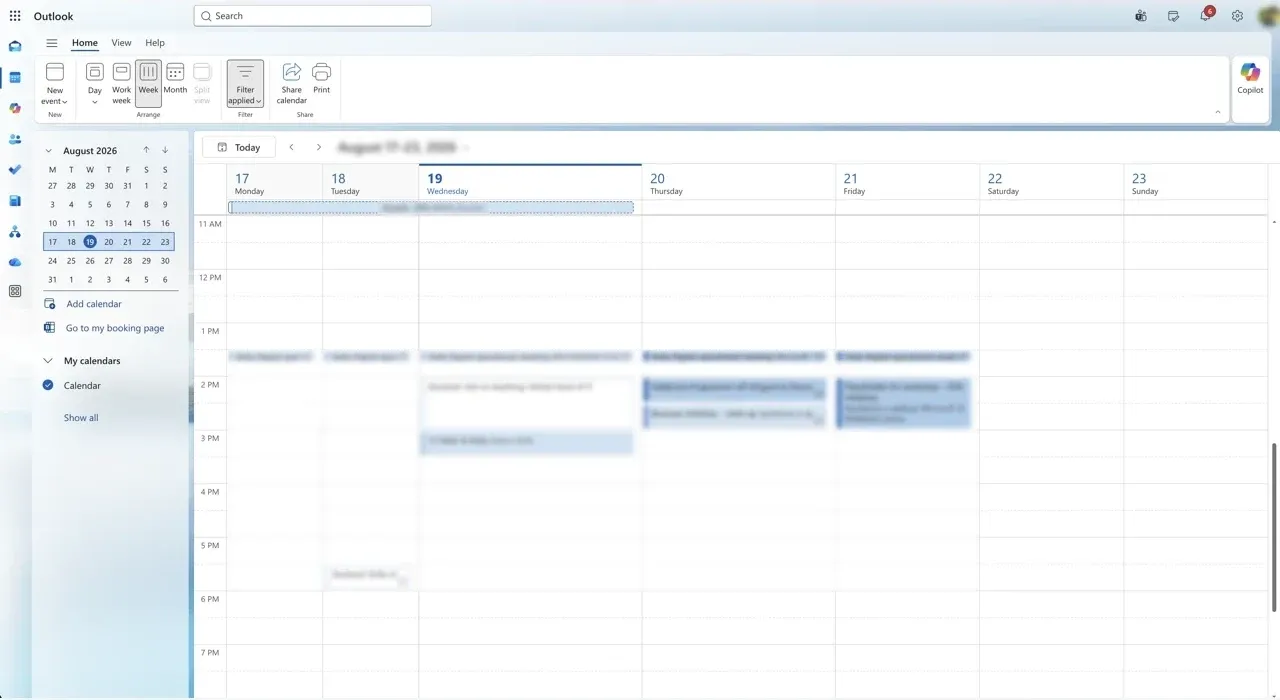
When you click Export calendar, the extension:
- takes note of the calendar page you’re currently on;
- switches to the weekly view and goes through a 28-day period, 7 days back and 21 days forward;
- collects the events, removes duplicates that can appear when moving from one week to another, and skips declined events and absences unless you’ve chosen to include them;
- generates the
.icsfile, converting each event’s time to the correct time zone for its date, including when the period crosses a daylight saving time change; - returns to the page you started from.
No data is written or modified during the process, and the page is temporarily dimmed to prevent accidental interaction.
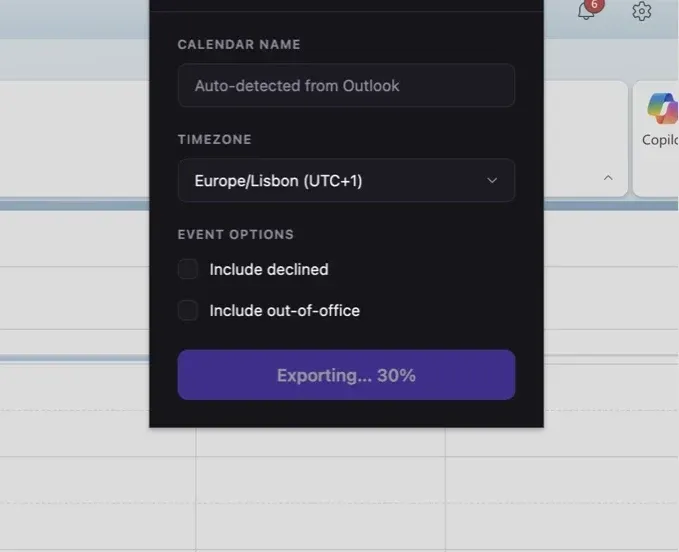
There are two requirements to keep in mind: the extension only works with Outlook on the web, so you need to open your calendar in Edge, Chrome, or another browser. It won’t work from the Mail or Teams apps. Also, Outlook’s web interface must be in English. The extension identifies events through the text labels on the page, at least for now, so make sure you temporarily switch the calendar’s language preferences or the export won’t work.
What it exports
For each event, the file contains:
- title, date, start time, and end time;
- all-day and multi-day events;
- organizer and location or room, when Outlook displays them;
- event status (busy, free, tentative) and recurring-event information.
Attendees, invitation text or meeting notes, attachments, and email addresses are not exported. The extension does not access your mailbox, files, or contacts, and it does not collect data: no analytics, no telemetry, and no account.
The code is public on GitHub, so you can inspect exactly how it works. Details about data handling are available in the extension’s privacy policy.
Downloading the file or publishing it
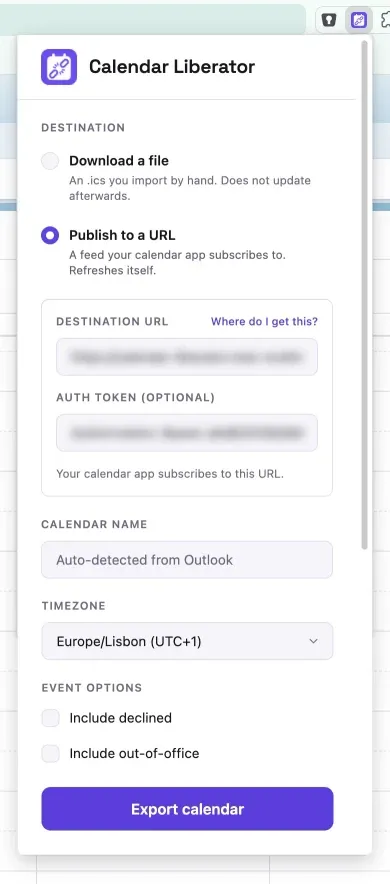
The popup lets you choose what to do with the generated file.
Download a file is the default option. The .ics file is saved to your downloads folder, and you can manually import it into your calendar app, for example on macOS via File → Import… or from the settings of the web version of Google Calendar.
- Pros: no configuration required, and the calendar never leaves your computer. In this mode, the extension makes no network requests.
- Cons: the file represents the calendar as it was at the time of export. If a meeting is moved or canceled, you have to export and import the file again. On iPhone, manually importing an
.icsfile is also fairly impractical.
Publish to a URL instead sends the file to an address you control. Calendar apps subscribe to that address once and can then check it periodically.
- Pros: once everything is configured, a single click in the extension updates the file for all your devices. Each publication replaces the previous file, so canceled or moved events are also removed from the subscribed calendar.
- Cons: you first need to set up somewhere to publish the file. The calendar data leaves your computer and is sent to the server you choose. The read URL must also be treated like a password: anyone who knows it can read your calendar.
Calendar Liberator does not host the file. It simply sends it to the address you provide. Setting up an endpoint like this is the rest of this guide.
Manual (and intentional) synchronization
In both modes, the export starts only when you click Export calendar. With publishing, calendar apps can update automatically from the published file, but the file itself doesn’t change until you manually run another export.
That’s a direct consequence of how the extension works. Updating the calendar without your intervention would require a way to access your work account, which would violate your company’s policies and require access to Microsoft’s APIs, an IT-approved application, or credentials stored on a server.
Calendar Liberator does none of that. It reads the visual interface of the Outlook page you already have open, and only does so when you ask it to. It doesn’t store credentials or attempt to bypass your company’s controls.
When you want to update the calendar, Outlook needs to be open in your browser. For a few seconds, the extension uses the tab to move through the weeks. In practice, a single export at the end of the day or after making significant changes to your calendar may be enough.
Look, but don’t touch
Calendar Liberator is NOT a two-way sync. Data goes from Outlook to your devices, but your devices don’t communicate with your work computer.
- if you’ve imported the file and delete or modify an event in your phone’s calendar, Outlook doesn’t change. The meeting stays there and will reappear the next time you export;
- if you’ve subscribed to the published address, the calendar is read-only and the app won’t let you modify or delete events.
This is intentional. Writing to Outlook would require much broader permissions, and a mistake made from your phone could modify your work calendar, upload your personal events there, or send notifications to organizers. Invitations, changes, cancellations, and replies to organizers continue to be handled in Outlook.
Technical questions: why isn’t a synced folder enough?
The first solution that comes to mind is saving the file in a folder that’s synced between your devices. The problem is that, to automatically update a subscribed calendar, a calendar app needs to be able to download the file from an HTTPS address.
That’s what rules out many of the more obvious solutions:
| Idea | Why it doesn’t work |
|---|---|
| A file on your computer | macOS Calendar doesn’t use file:// addresses for subscriptions. |
| A small local web server | It works on your Mac, but from your phone localhost refers to the phone itself, not your computer. |
| iCloud Drive | Third-party apps don’t have a generic API for publishing a file as a subscribable calendar. |
| Google Drive | Google stopped serving files directly in 2016, and the remaining ways to obtain a download URL aren’t a reliable solution for this use case. |
| Dropbox | It can serve the file, but writing to it from the extension would require connecting the account through OAuth, which Calendar Liberator doesn’t currently do. |
A browser extension doesn’t have the same access as a native app. It’s just JavaScript running inside the browser, and it can’t interact with the local disk or system services in the same way a native app can. Calendar Liberator can only send the file to an HTTP endpoint.
How to publish the .ics to a private URL
Publishing the calendar is fairly straightforward: Calendar Liberator sends an HTTP PUT request with the .ics file in the request body. This means you can use any service that accepts authenticated PUT requests and then makes the file available over HTTPS.
In the popup, under Publish to a URL, you’ll find two fields:
- Destination URL: the address where the file should be sent.
- Auth token (optional): the value that will be sent as
Authorization: Bearer <value>. If the service requires a different header, you can enter it directly in the formName: value.
In this guide, we’ll use Cloudflare Workers with R2 storage, which is the solution I use myself. For this kind of use, the free plan is more than enough, and the file stays in storage that you control directly. I’ll also cover some alternatives at the end of the article.
Setting up the address with Cloudflare R2
Cloudflare updates its dashboard frequently, so some screens may look slightly different from the ones shown here.
You’ll need:
- a Cloudflare account (the free plan is enough);
- Node.js installed, to use
wrangler, Cloudflare’s command-line tool; - around ten minutes and a terminal.
Node.js, wrangler and the terminal are optional: every step can also be done from the Cloudflare dashboard, and you’ll find how right after each step’s commands.
1. Create the R2 bucket
In the Cloudflare dashboard, open R2 and create a bucket dedicated to the calendar. Keeping it separate from your other files makes it easier to understand what’s in it and manage it later.
The name is up to you, for example my-calendar.
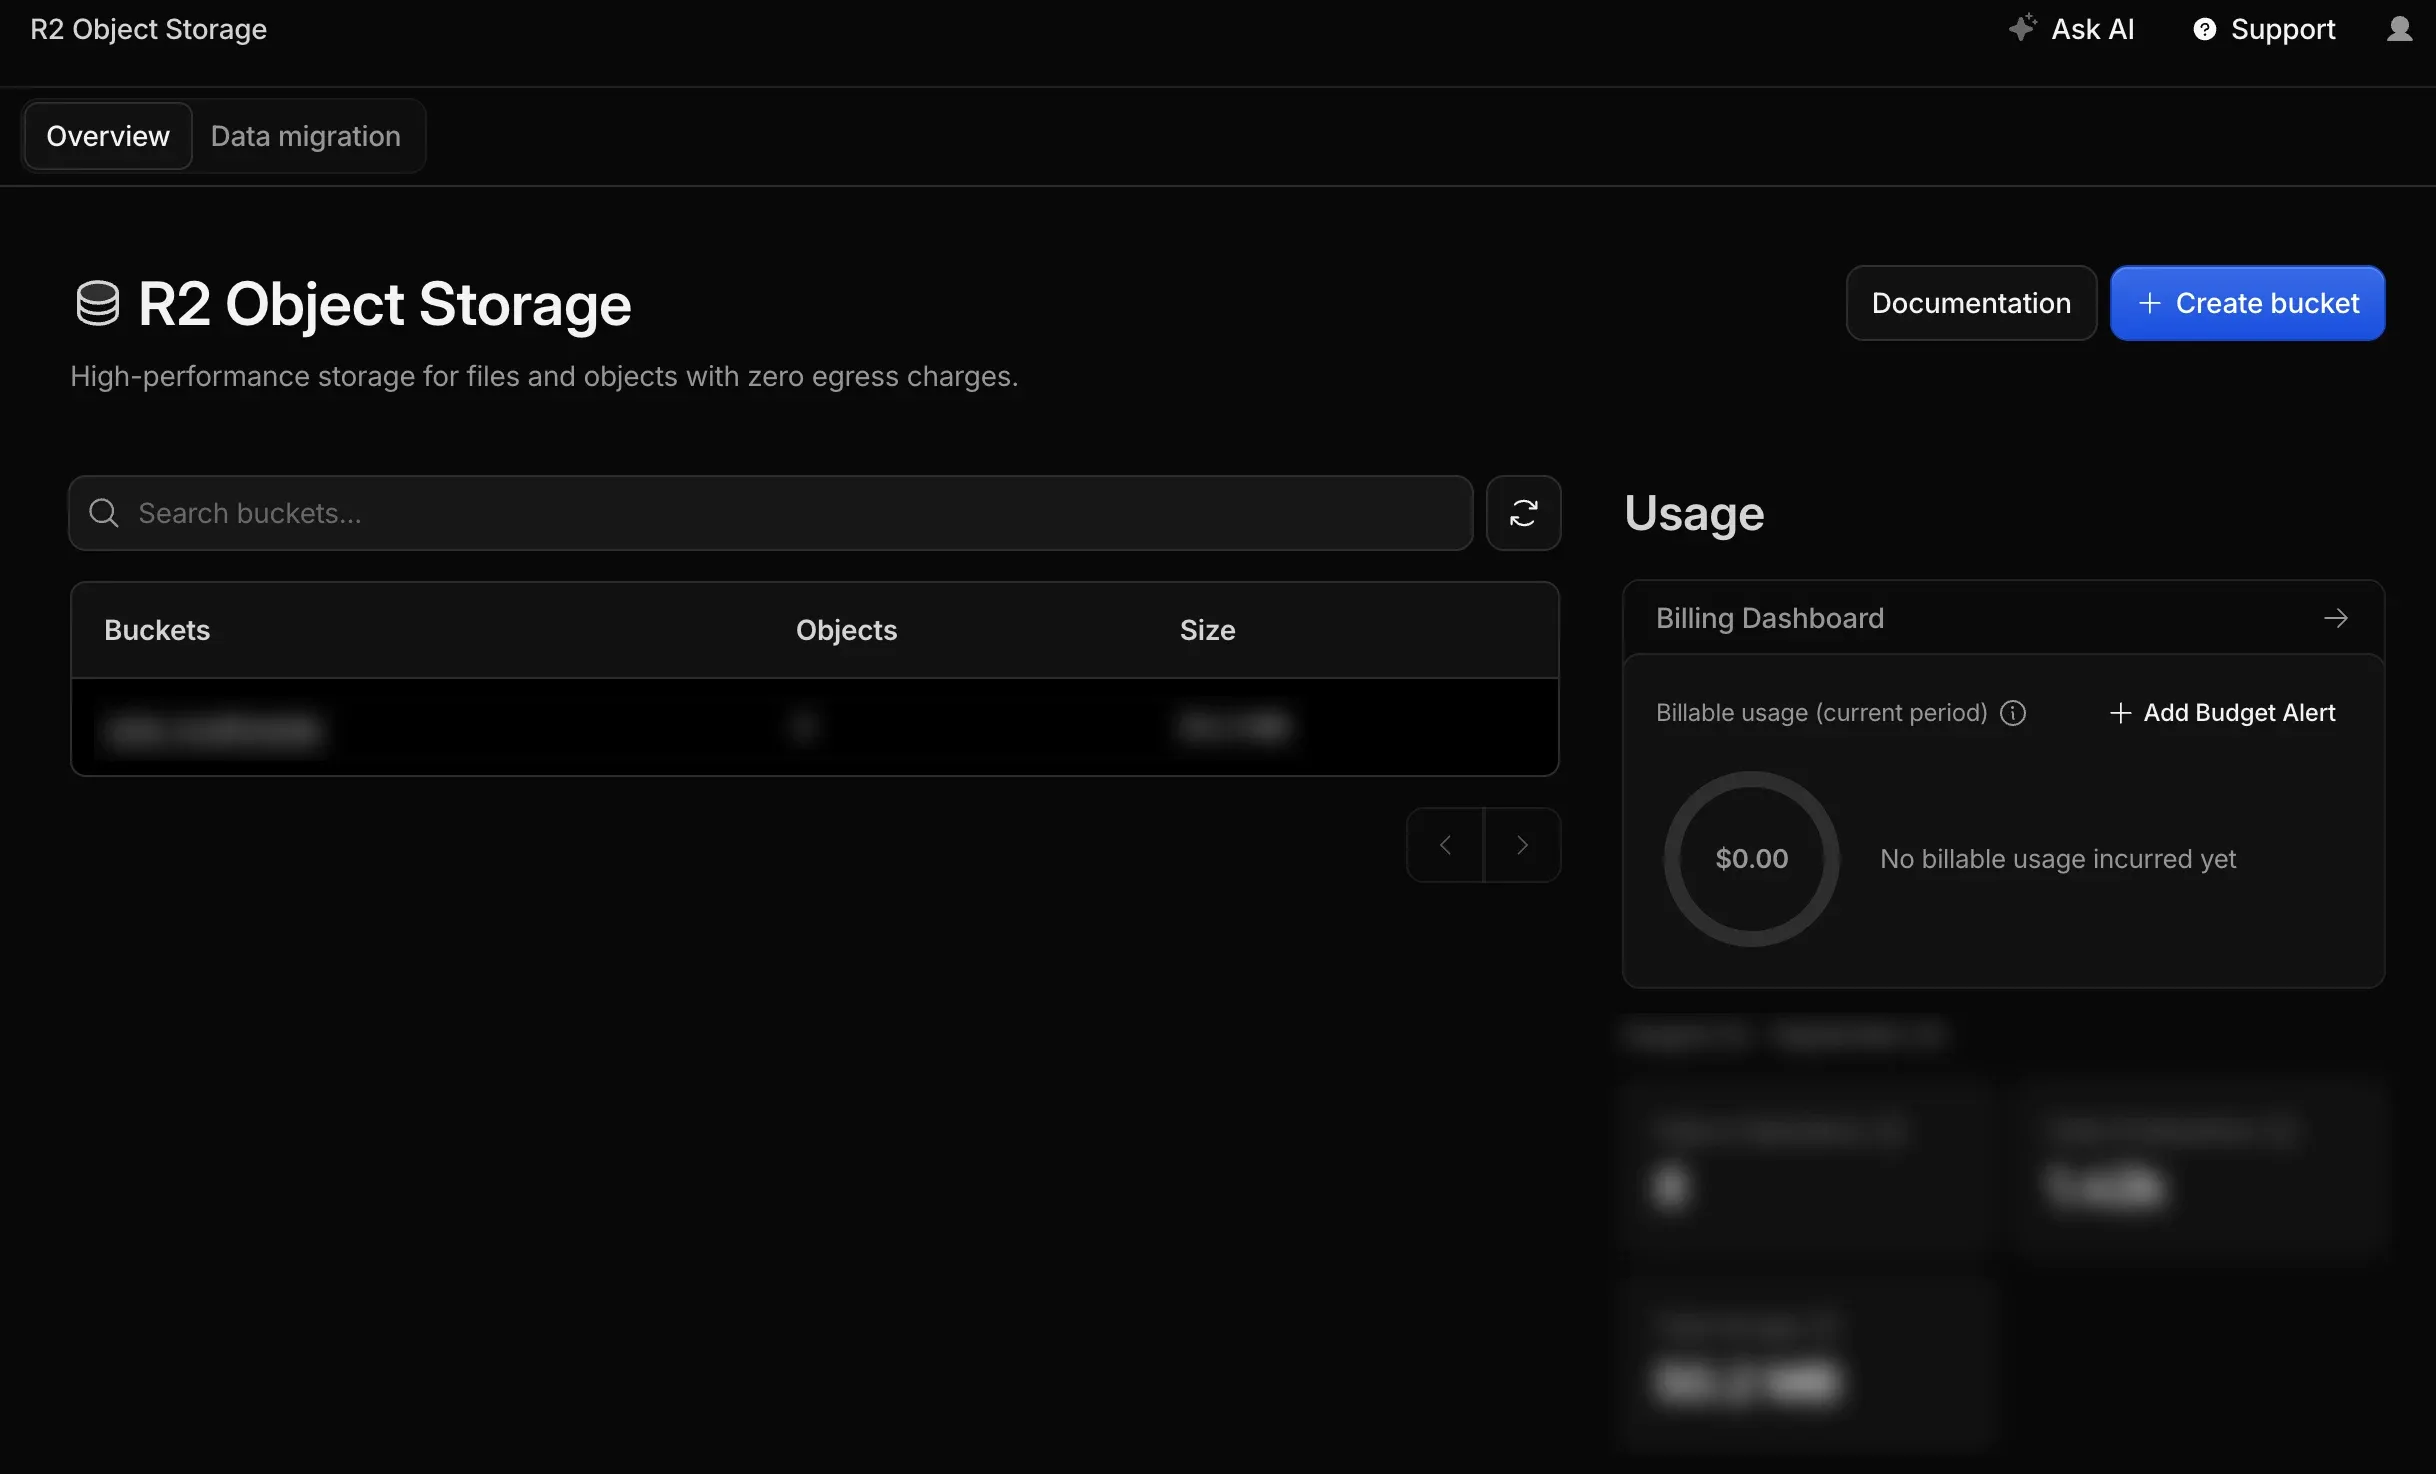
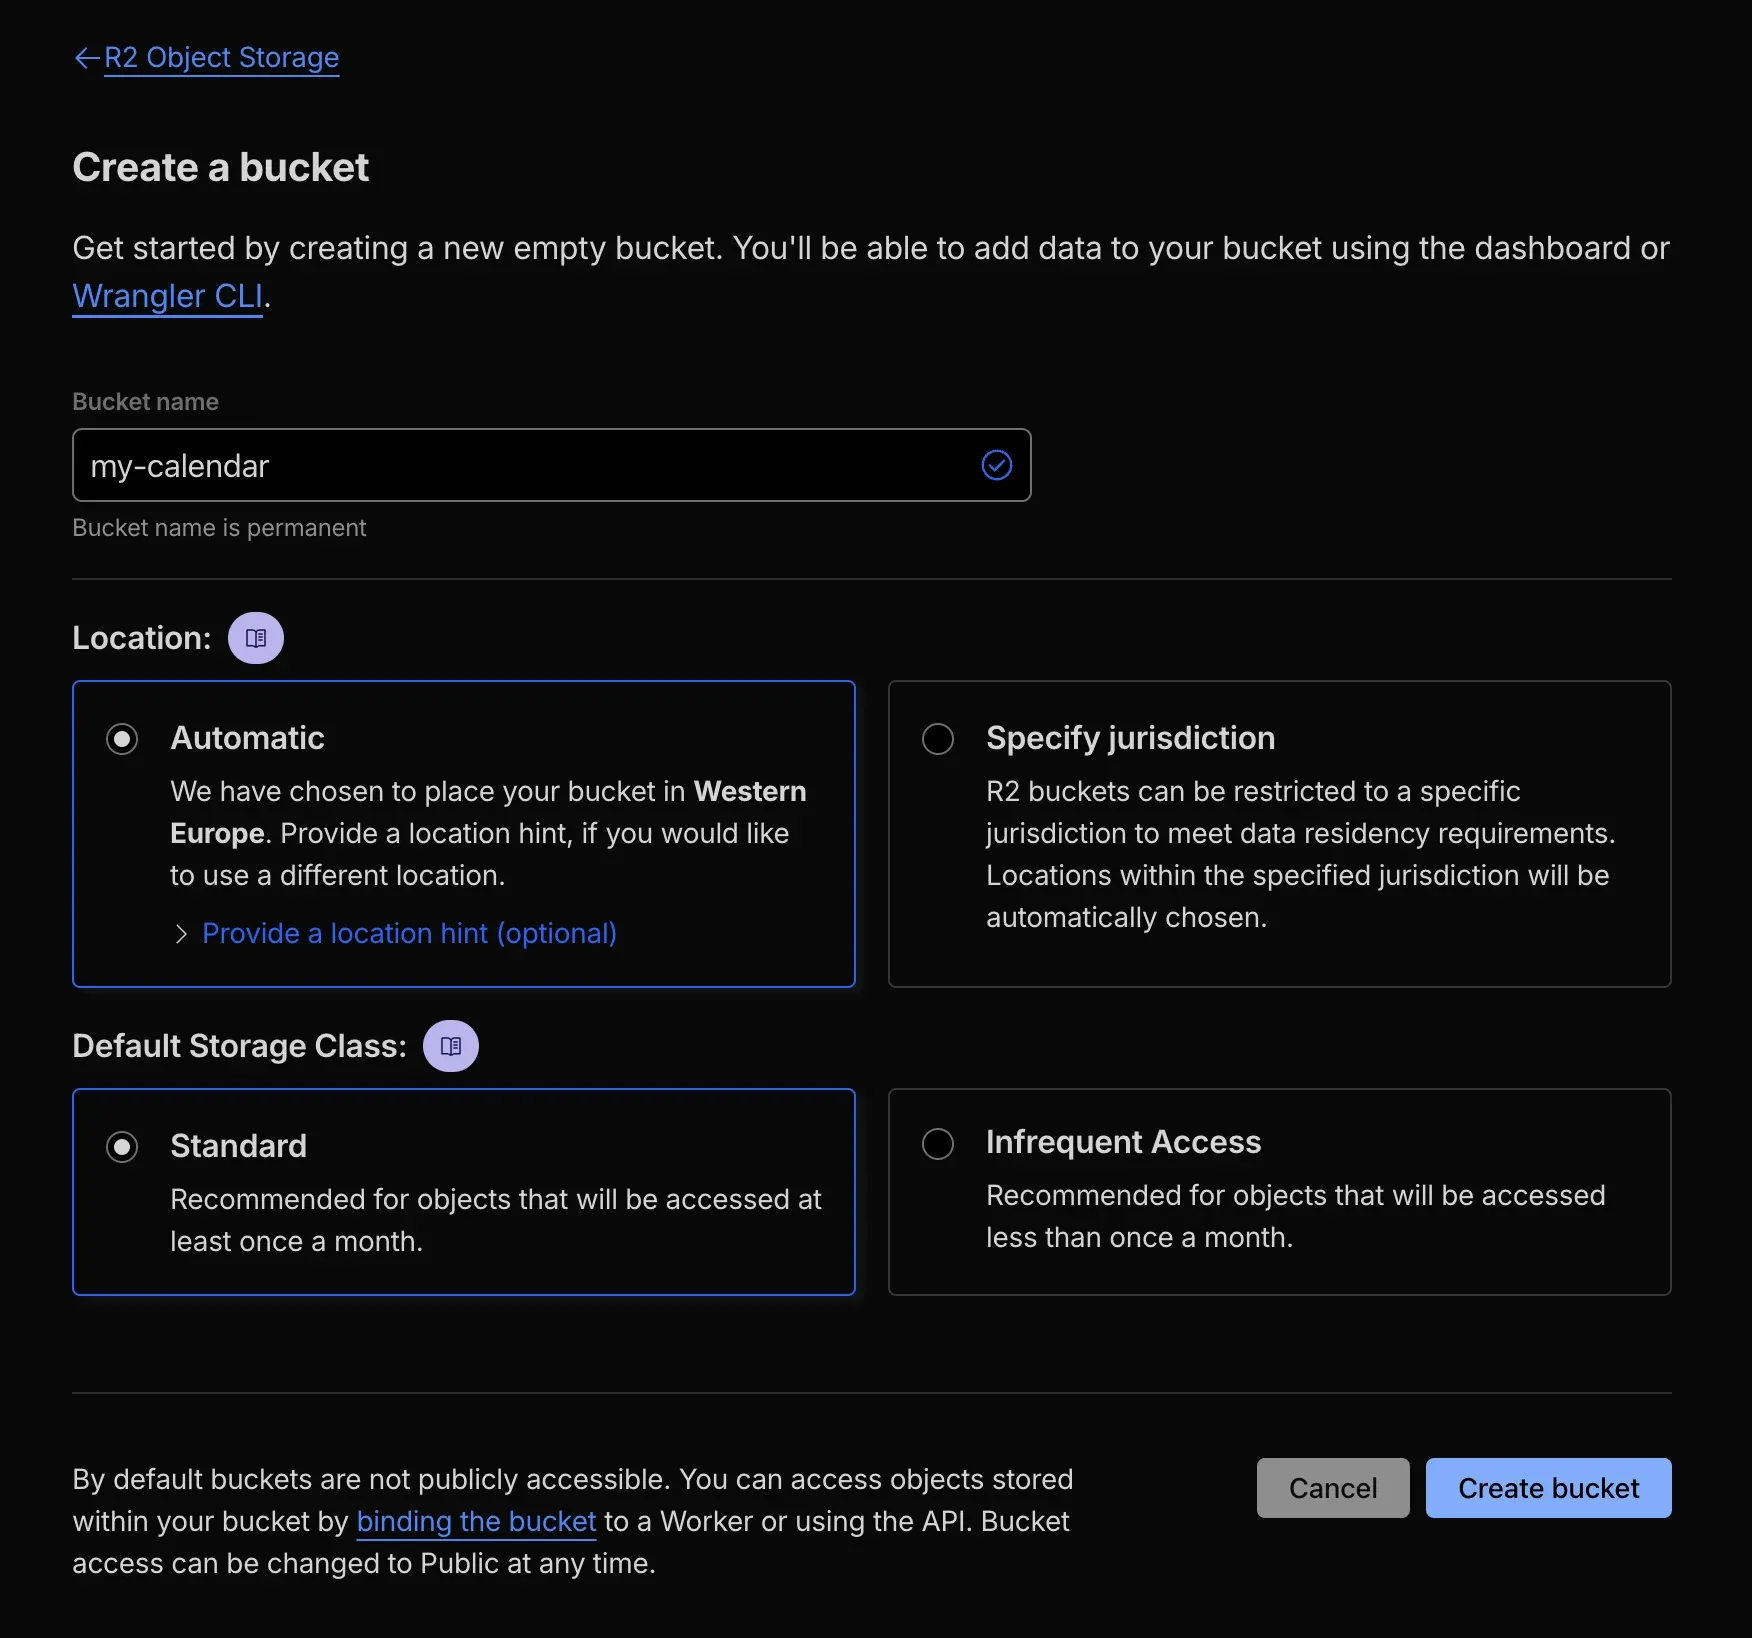
You can also create it from the terminal after connecting wrangler to your account:
wrangler r2 bucket create my-calendar2. Create the Worker
Our endpoint will consist of two files. Create a folder wherever you like and install wrangler:
mkdir calendar-endpoint && cd calendar-endpoint
npm install -g wrangler
If npm reports that the installation scripts for esbuild and workerd were skipped, you can ignore the warning: wrangler --version will let you verify that the installation completed successfully.
From this point on, all commands must be run from this folder, because this is where the Worker configuration lives.
The first file is worker.js. It’s short enough to read through before pasting it:
const OBJECT_KEY = 'calendar.ics';
const WRITE_PATH = 'calendar.ics';

export default {
    async fetch(request, env) {
        const path = new URL(request.url).pathname.slice(1);

        if (request.method === 'PUT' && path === WRITE_PATH) {
            if (request.headers.get('Authorization') !== `Bearer ${env.UPLOAD_TOKEN}`) {
                return new Response('Unauthorized\n', { status: 401 });
            }
            await env.CAL.put(OBJECT_KEY, await request.arrayBuffer());
            return new Response('Published\n');
        }

        if (request.method === 'GET' && path === env.READ_PATH) {
            const object = await env.CAL.get(OBJECT_KEY);
            if (!object) {
                return new Response('Nothing published yet\n', { status: 404 });
            }
            return new Response(object.body, {
                headers: {
                    'Content-Type': 'text/calendar; charset=utf-8',
                    'Cache-Control': 'public, max-age=300'
                }
            });
        }

        return new Response('Not found\n', { status: 404 });
    }
};
There are three things worth keeping in mind:
- Writing is protected by a token; reading is not. This is necessary because a calendar app needs to be able to download the file without logging in. That’s why the read address contains a long random string and must be treated as a secret.
- The write token and the read address are two separate secrets. The read link will end up in your app settings and be used on your devices. If the same value also allowed writing, anyone who obtained the link could overwrite the calendar.
- The cache lasts five minutes (
max-age=300). A longer cache could delay changes from appearing and make it look as though the export hadn’t worked.
The second file is wrangler.toml. This tells Cloudflare what the Worker is called and which bucket it should use. Set bucket_name to the name of the bucket you created in step 1:
name = "my-calendar"
main = "worker.js"
compatibility_date = "2026-09-01"

workers_dev = true
preview_urls = false

[[r2_buckets]]
binding = "CAL"
bucket_name = "my-calendar"
name is the name of the Worker and becomes part of its public address. You can change it, but we’ll use my-calendar in the examples below. preview_urls = false prevents Cloudflare from creating an additional public address for preview versions. You don’t need it here, and having another endpoint exposing the same code would only add another thing to keep track of.
If you’d rather not paste the files manually, you can find both of them in the Calendar Liberator repository, under examples/publishing-endpoint/, together with a dedicated README:
git clone https://github.com/fabiocchetti/calendar-liberator.git
cd calendar-liberator/examples/publishing-endpoint
cp wrangler.toml.example wrangler.toml
From the dashboard: open Workers & Pages → Create → Worker, start from the Hello World template, name it my-calendar and click Deploy. Then click Edit code, replace everything with the contents of worker.js and click Deploy again. You don’t need wrangler.toml: you connect the bucket from the Worker’s page, in the Bindings tab → Add binding → R2 bucket, with CAL as the variable name and my-calendar as the bucket. In the Domains tab you can turn off Preview URLs.
3. Connect wrangler to your account
wrangler loginThe command will open your browser and ask you to authorize access.
From the dashboard: skip this step, you’re already signed in to your account.
4. Generate the two secrets
openssl rand -hex 16    # will become UPLOAD_TOKEN
openssl rand -hex 16    # will become READ_PATH
Save both values in your password manager. Cloudflare stores them, but you won’t be able to retrieve their plain-text values later.
Without a terminal: use your password manager’s generator to create two random strings of at least 32 characters, letters and numbers only. READ_PATH ends up inside a web address, where symbols like /, ? or # would break it.
5. Upload the secrets to Cloudflare
wrangler secret put UPLOAD_TOKEN
wrangler secret put READ_PATH
The secret names must be exactly UPLOAD_TOKEN and READ_PATH. When wrangler shows Enter a secret value, paste the value you generated in the previous step.
The first command may show a message like “There doesn’t seem to be a Worker called…”. Answer Y. The Worker hasn’t been published yet, so wrangler first needs to prepare the resource the secret will be associated with.
From the dashboard: on the Worker’s page, open Settings → Variables and Secrets → Add, choose the Secret type, enter UPLOAD_TOKEN as the name and paste the value. Repeat with READ_PATH, then confirm with Deploy.
6. Deploy the Worker
wrangler deployWhen it’s finished, wrangler will show the Worker address, in the form:
https://my-calendar.<your-subdomain>.workers.devYou’ll need it both to configure the extension and to subscribe your devices to the calendar.
From the dashboard: you already deployed the Worker in step 2. You’ll find its *.workers.dev address at the top of the Worker’s Overview tab.
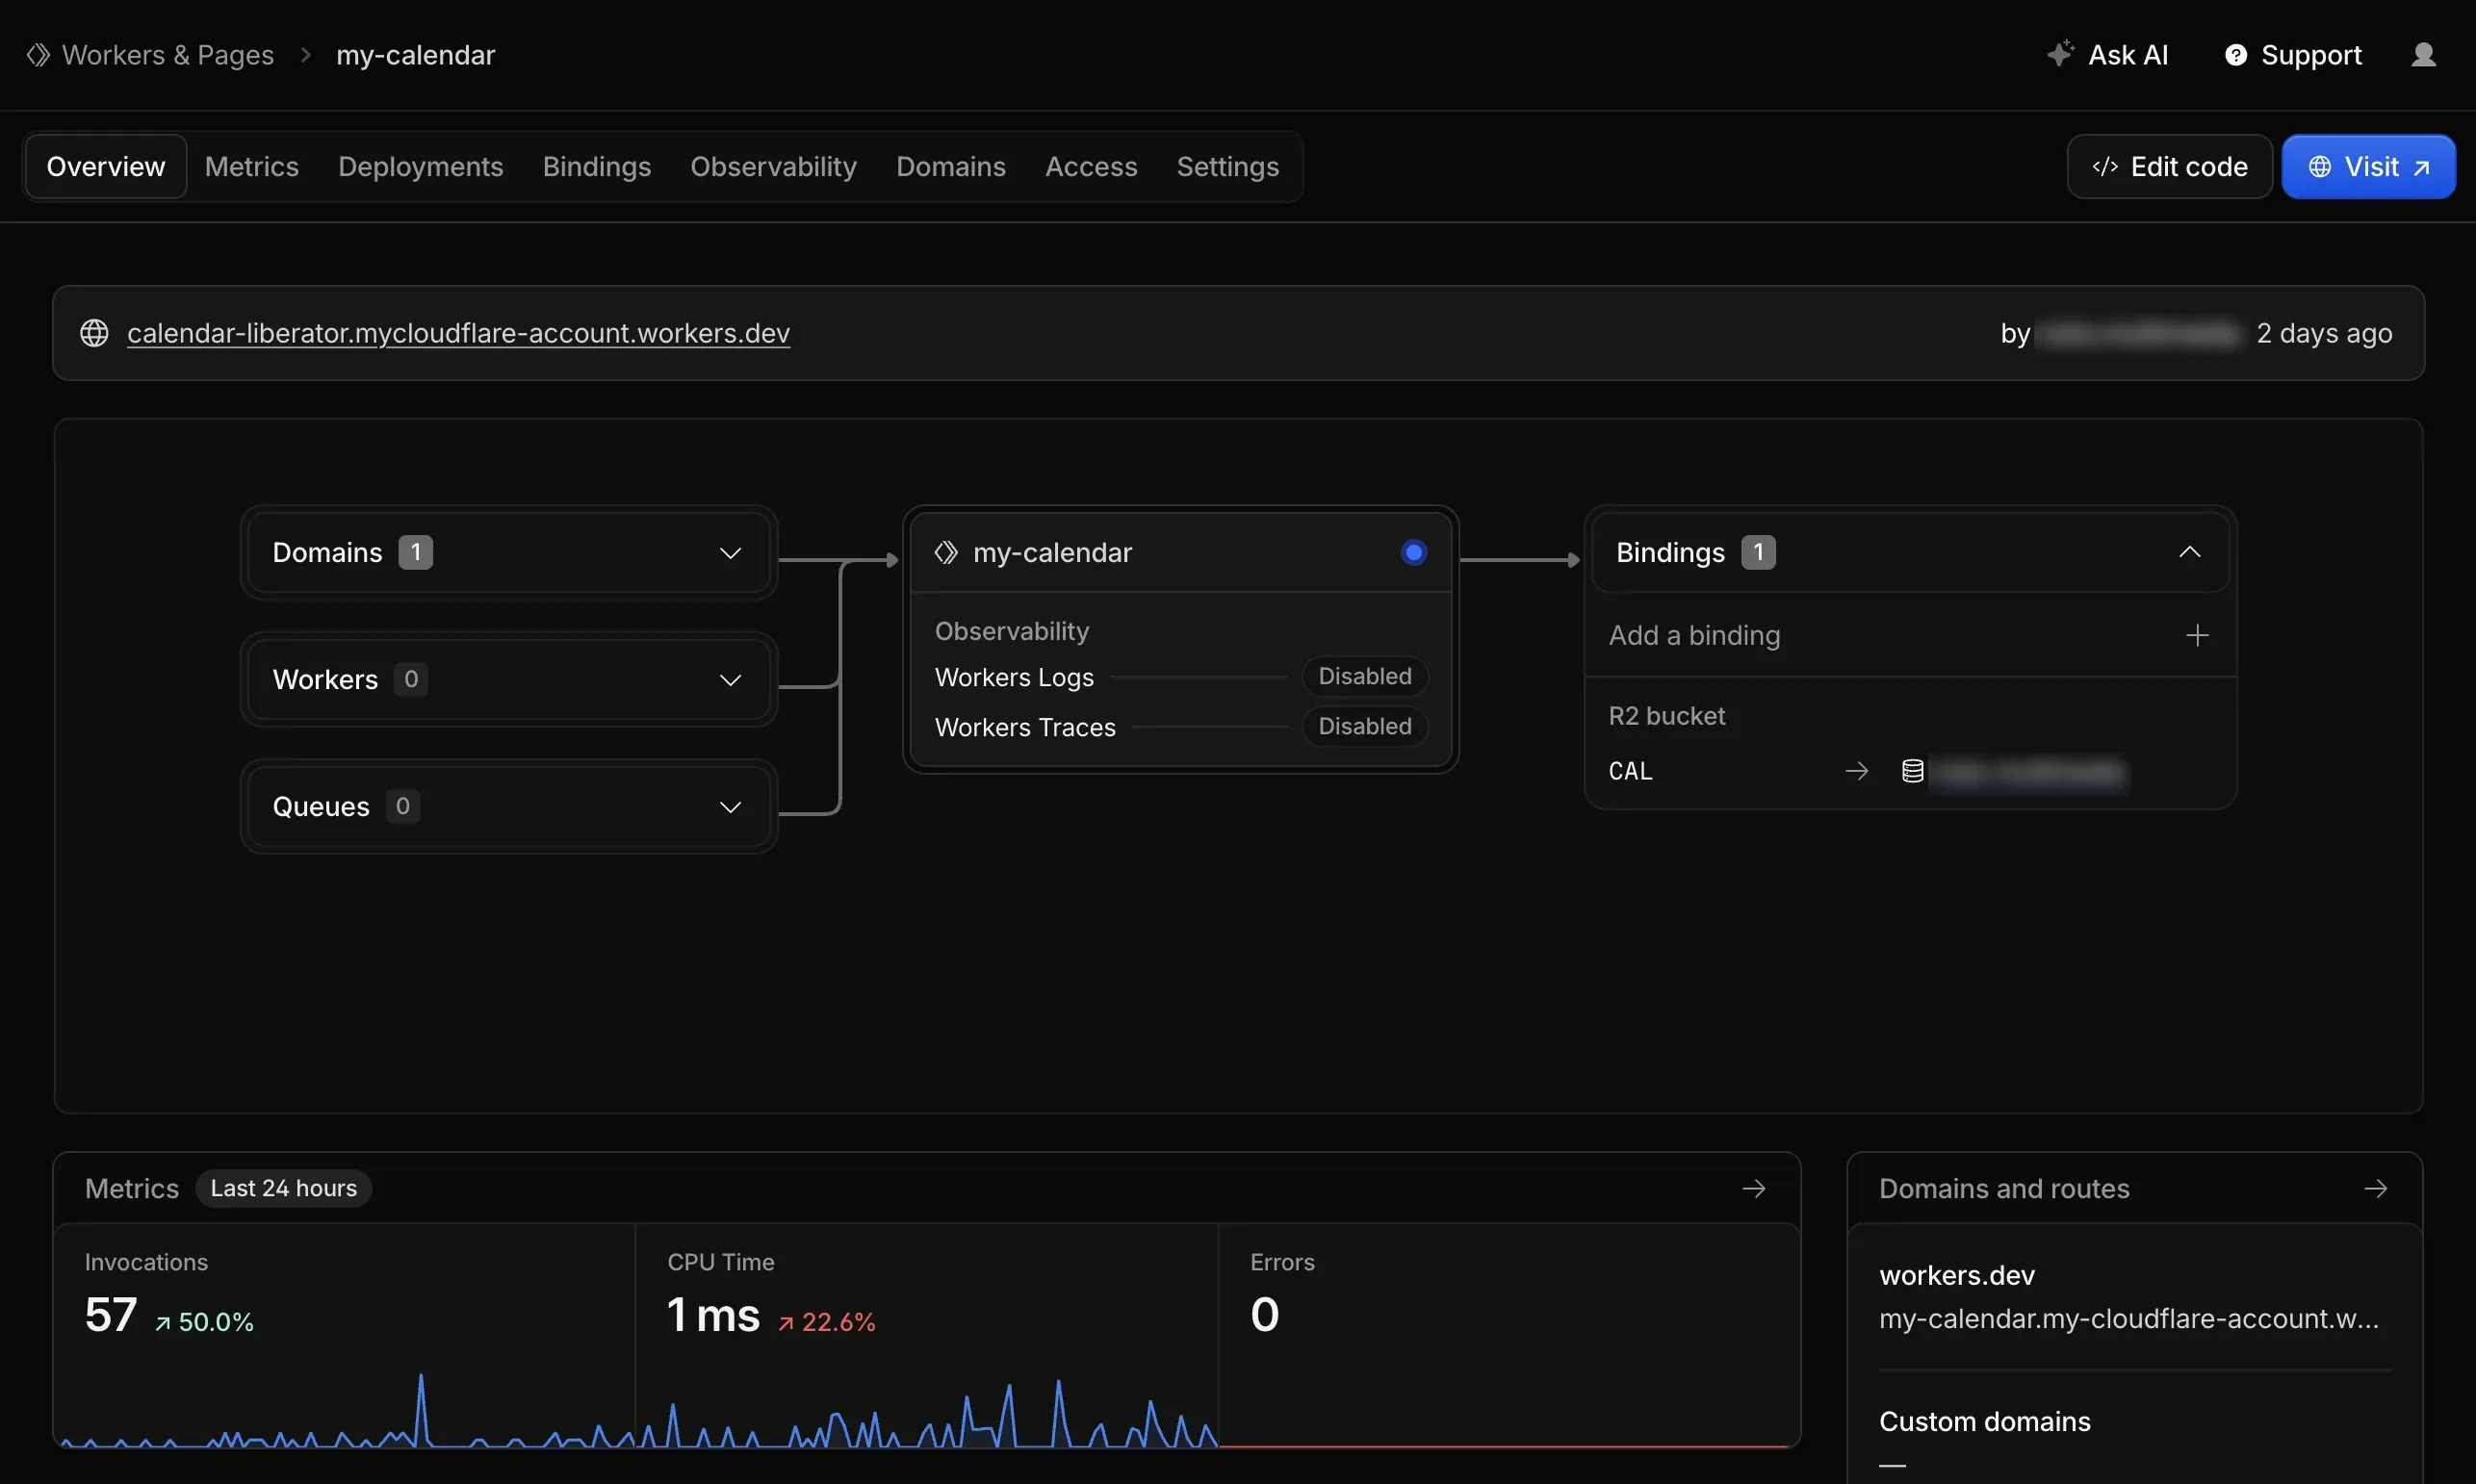
Whichever way you got there, the Worker’s page should end up looking like this: a workers.dev address in the Domains box and a single binding, CAL, connected to the R2 bucket.
Connecting the extension
Open Outlook on the web, click the Calendar Liberator icon, choose Publish to a URL, and fill in the two fields:
| Field | Value |
|---|---|
| Destination URL | https://my-calendar.<your-subdomain>.workers.dev/calendar.ics |
| Auth token | the value of UPLOAD_TOKEN |
Then click Export calendar.
The first time, your browser may ask you to allow the extension to contact that address. The request may close the popup; if that happens, open it again and click Export calendar once more.
The settings are saved only on this computer. They aren’t synced with your browser account, precisely because they include the write token.
Subscribing to the calendar
You now need the read address, which is different from the one used to publish the file:
https://my-calendar.<your-subdomain>.workers.dev/<your READ_PATH>Don’t add .ics to the end.
On macOS and iOS, you can also replace https:// with webcal://: when you open the link, the system should offer to subscribe to the calendar directly.
Your Outlook work calendar on Mac
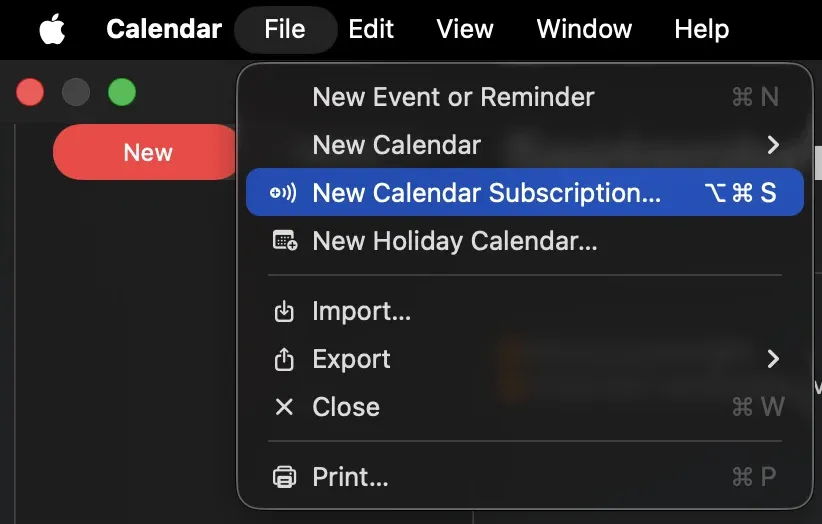
Open Calendar and choose File → New Calendar Subscription….
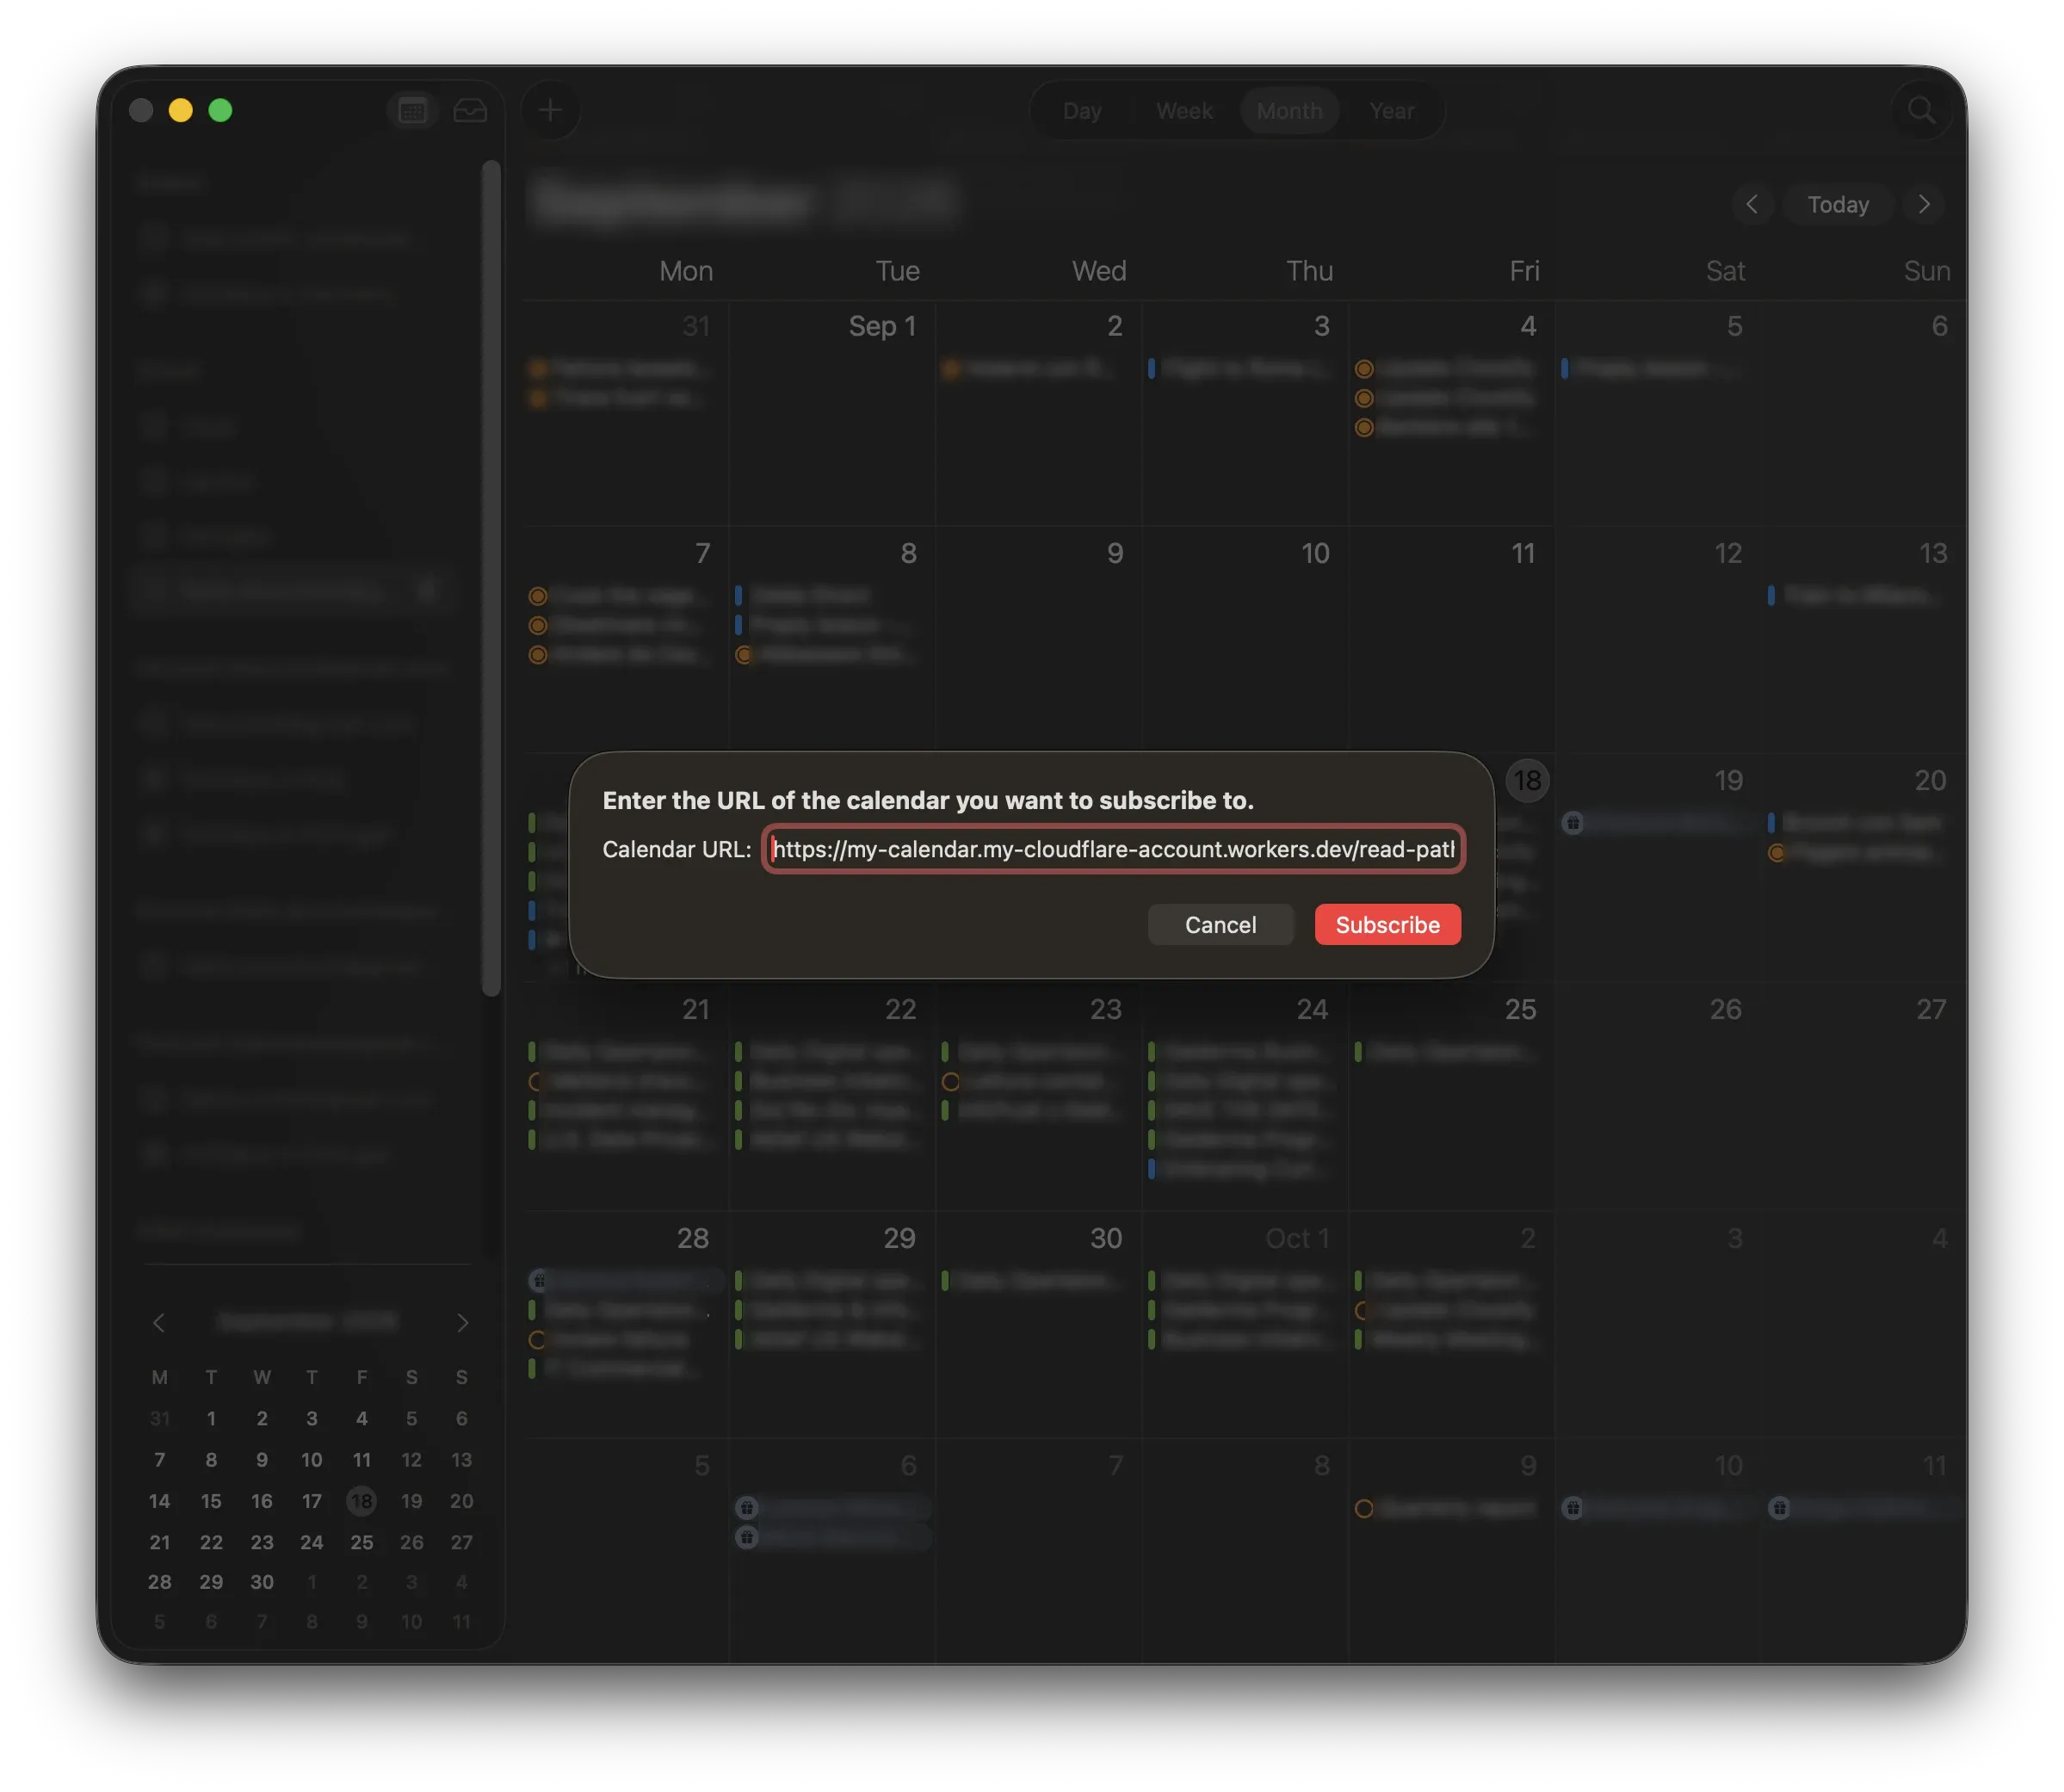
In the window that opens, paste the read address into the Calendar URL field and click Subscribe.
In the next window, choose a name and color for the calendar and, most importantly, set Auto-refresh to every 15 minutes or every hour. With the default daily refresh, changes may take too long to appear and make it look as though something isn’t working.
Your Outlook work calendar on iPhone and iPad
Go to Settings → Apps → Calendar → Calendar Accounts → Add Account. At the bottom of the provider list, choose Subscribed Calendar.
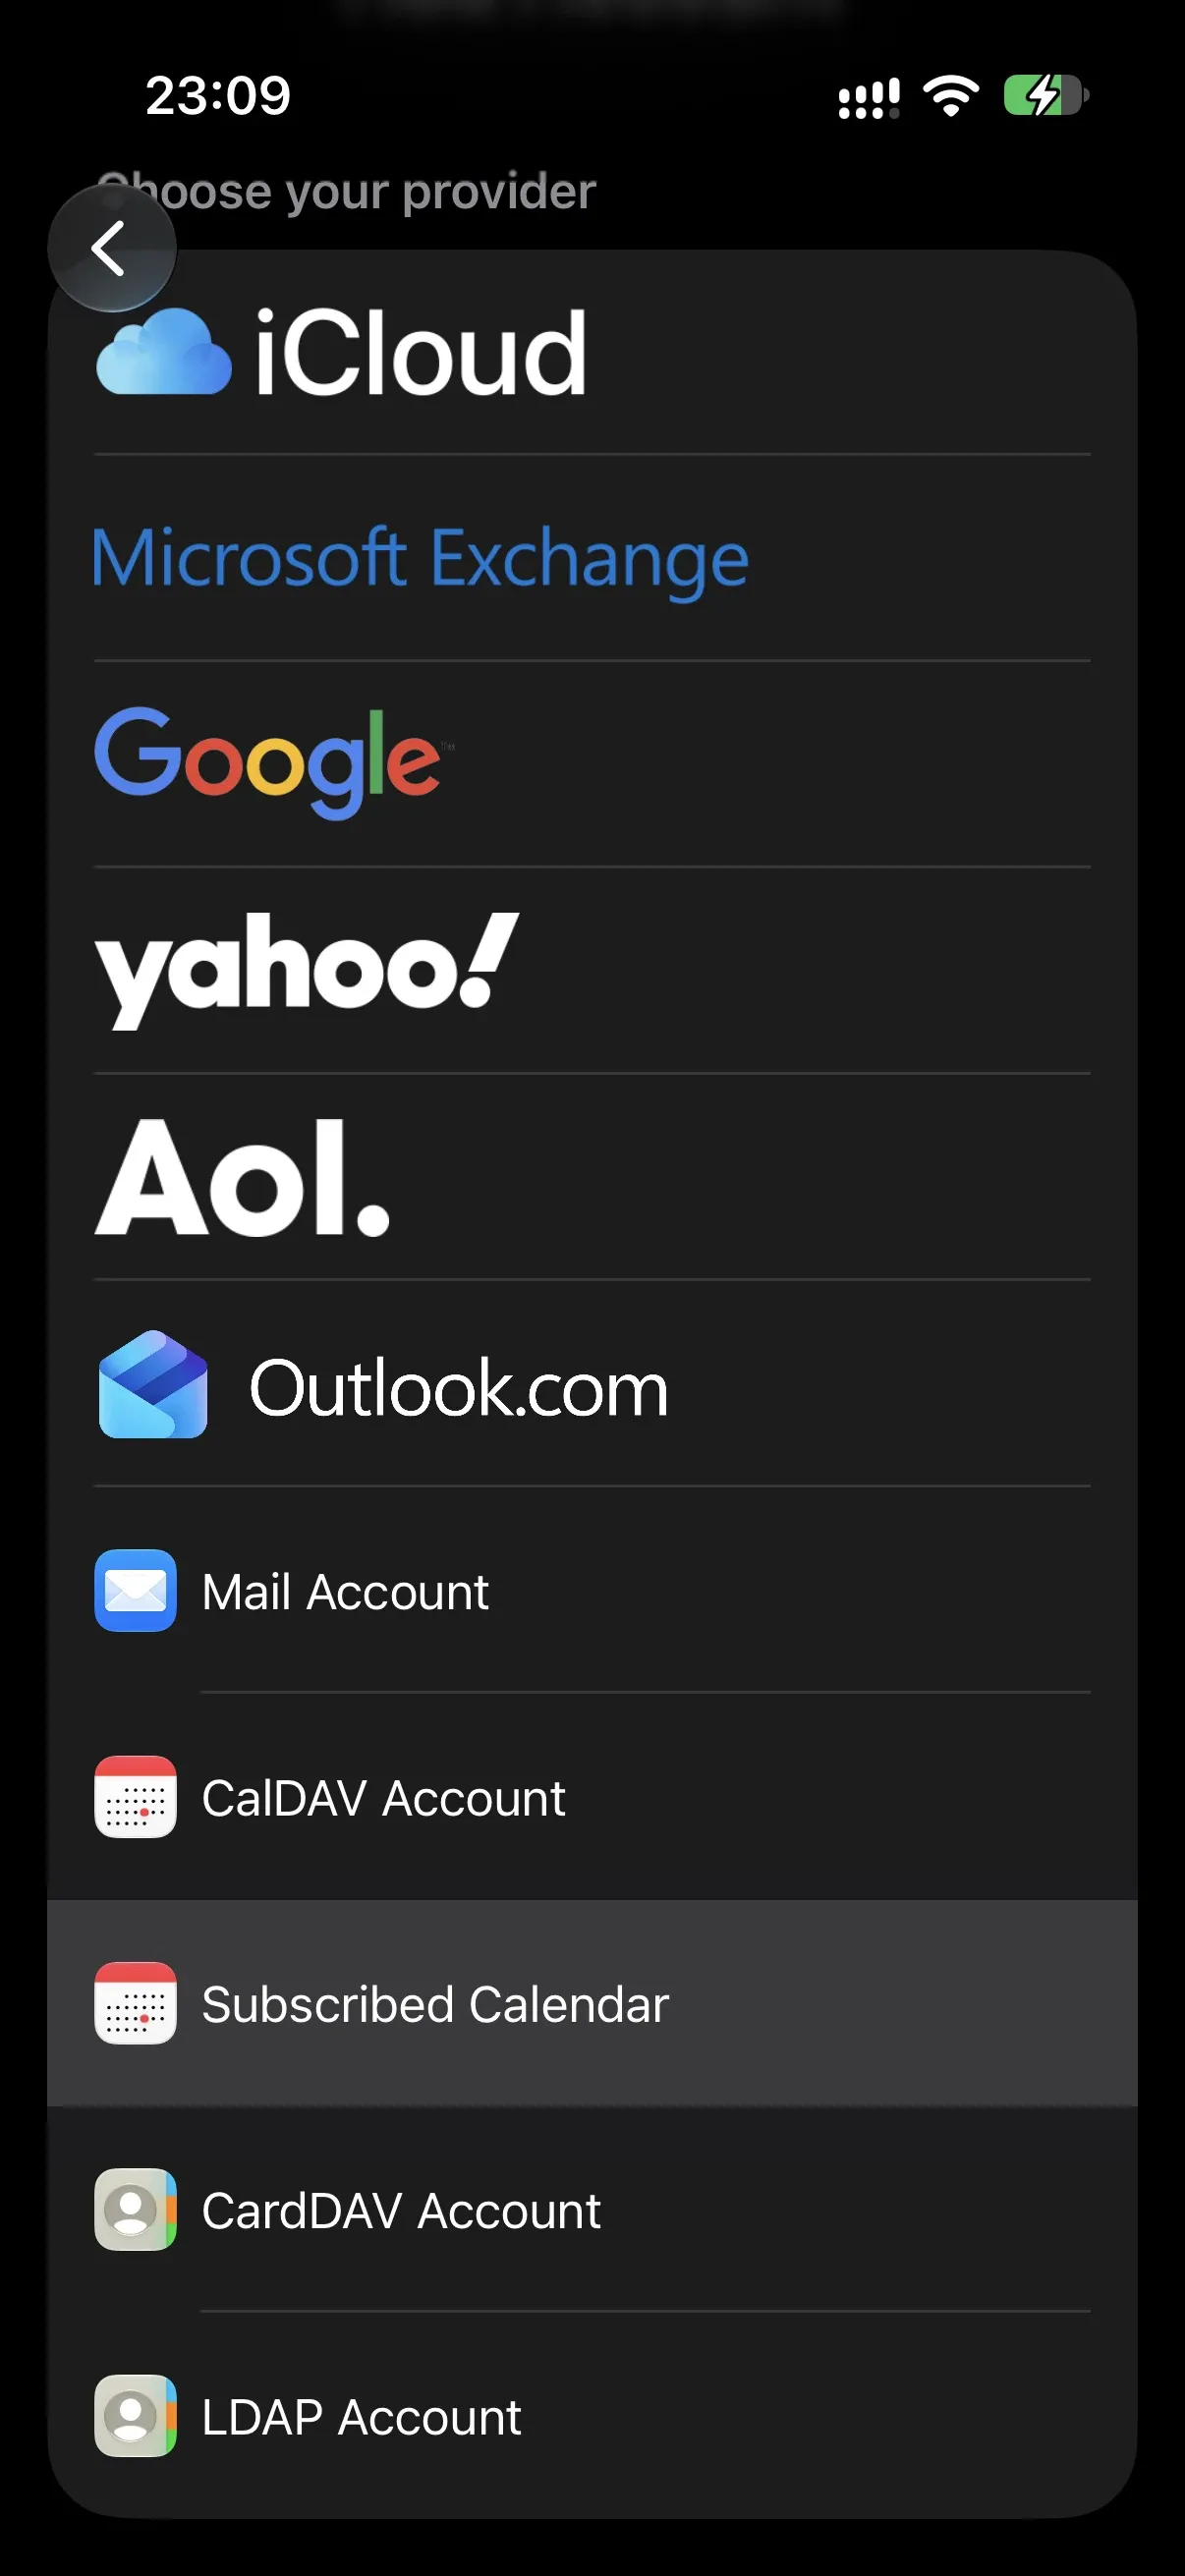
Paste the read address into the Server field, tap Next, and then Save.
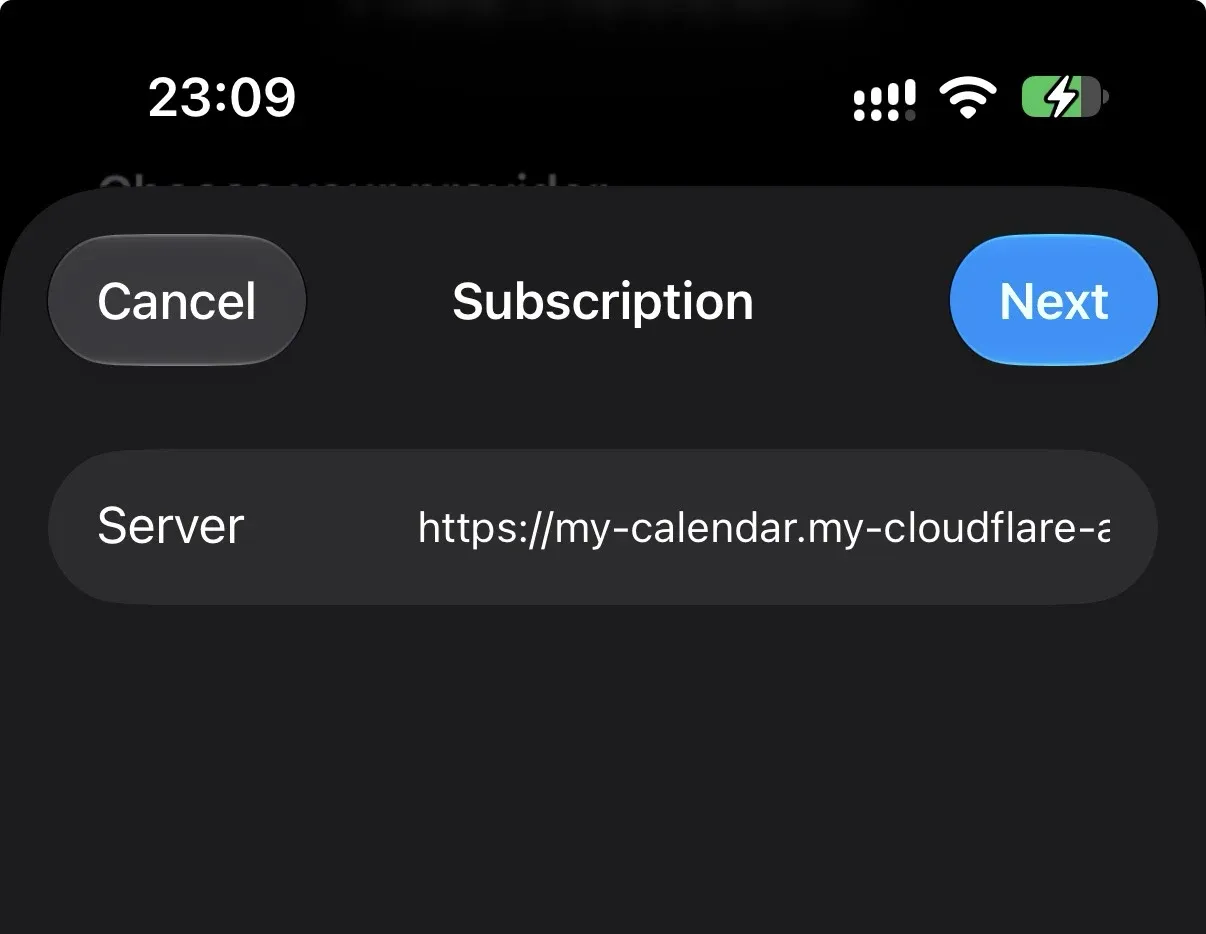
A subscription set up on your Mac isn’t automatically added to your iPhone: you need to configure it separately on each device.
On iOS, the refresh frequency also depends on the global Fetch New Data setting and can’t be configured separately for this calendar.
Your Outlook work calendar in Google Calendar
From the web version of Google Calendar, click the gear icon in the top right and choose Settings.
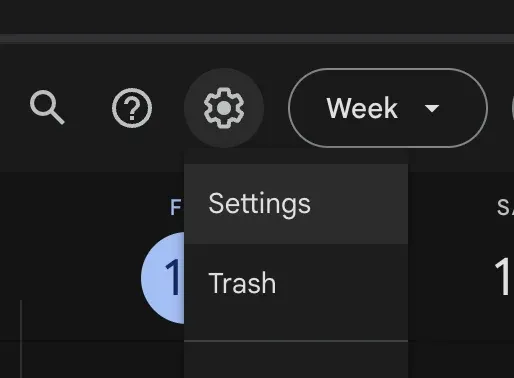
In the left-hand column, open Add calendar → From URL, paste the read address into the URL of calendar field, leave the option to make the calendar public unchecked, and click Add calendar.
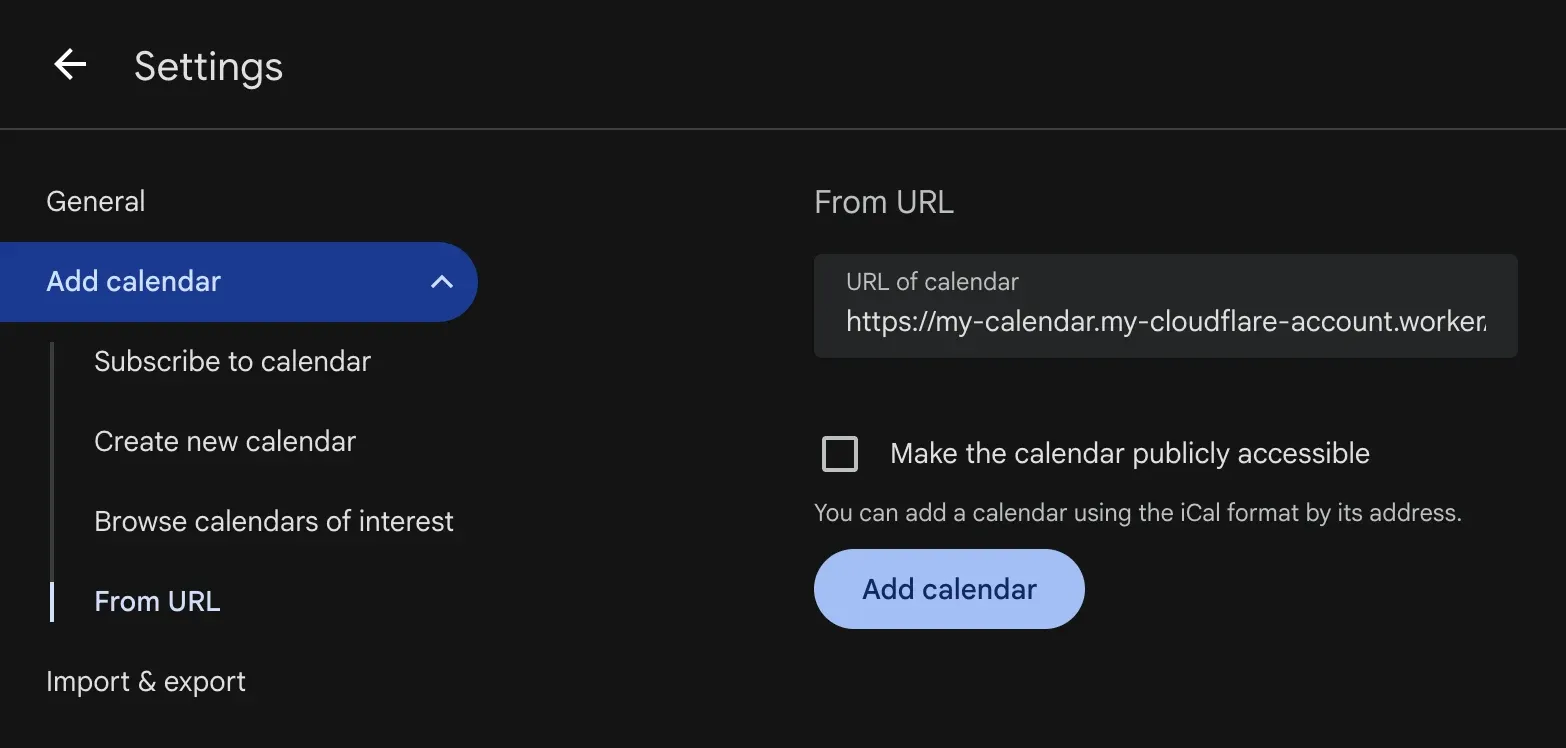
Google manages external calendars on its own refresh schedule, often taking several hours. If you want changes to appear more quickly, Apple Calendar gives you more control over the refresh frequency.
Alternatives to Cloudflare
Cloudflare isn’t required to use Calendar Liberator. The extension doesn’t depend on a specific service: it only needs an endpoint that accepts the PUT request described above.
So, if you already use one of the following services, you may not need to set up Cloudflare at all.
A WebDAV server. Nextcloud, ownCloud, Seafile, a Synology or QNAP NAS, pCloud, Box, Koofr, Fastmail Files, or Apache or nginx with WebDAV can accept PUT requests.
An example WebDAV URL is:
https://user:password@cloud.example.com/remote.php/dav/files/user/work.icsYou can then create a public link to the file and use that address to subscribe to the calendar.
PHP hosting. If you already have regular web hosting, this can be a very simple solution. All you need is a small script that receives the file and saves it on the server:
<?php
$token = 'paste-a-long-random-string-here';
if (($_SERVER['HTTP_AUTHORIZATION'] ?? '') !== "Bearer $token") { http_response_code(401); exit; }
file_put_contents(__DIR__ . '/work.ics', file_get_contents('php://input'));
Another serverless function. Deno Deploy, Val Town, an AWS Lambda Function URL, or a Vercel or Netlify function can do the same thing. The example Worker can be adapted to any of these services.
Services with custom headers. If a service requires a header other than Authorization: Bearer, you can enter it directly in the token field. For example, if the service requires AccessKey: …, enter the complete header in the field: Calendar Liberator will send it exactly as provided.
What’s coming
At the moment, publishing still requires you to set up an endpoint. It’s not particularly complicated if you’re comfortable with the terminal, but it’s certainly not the kind of configuration I’d want to ask everyone to do.
So the next steps are mainly about making the whole thing simpler:
- a Dropbox connection with a Connect button, instead of asking users to enter a URL, while keeping manual publishing as an advanced option;
- a one-click Cloudflare template, for anyone who wants to use R2 without having to configure everything manually.
Further down the line, I’d like to add support for other web-based calendar applications beyond Outlook, as well as Outlook interfaces in other languages.
A note on security
The read address doesn’t have a separate password. Calendar apps need to be able to download the file without authentication, so anyone who knows the address can read the calendar.
Treat the link like a password. Don’t put it in chats, public issues, or tickets where someone else could copy it.
If you think the link has fallen into the wrong hands, you can change it:
wrangler secret put READ_PATHEnter a new random value and subscribe to the calendar again on every device. The old address will no longer allow anyone to read the file.
And above all, keep in mind what Calendar Liberator does and doesn’t do: it exports the calendar; it doesn’t sync it both ways. Nothing is ever written back to Outlook, and the published calendar is read-only. Invitations, changes, cancellations, and replies to organizers still need to be handled in Outlook.
Try it
Calendar Liberator is free, open source, and distributed under the MIT license. You can install it from the stores for all three browsers:
The source code, documentation, and example Worker are available in the Calendar Liberator repository.
Frequently asked questions
Do I need my company's permission to use Calendar Liberator?
The extension does not bypass any technical controls: it reads what Outlook is already showing in your browser, using the session you are already signed in with. That said, your company's policy may determine where calendar data can be copied or published. If you're not sure, check your internal rules before publishing your calendar to an external server.
Can I accept an invitation or move a meeting from my iPhone?
No. The exported calendar is read-only: to accept an invitation, move a meeting, or reply to an organizer, you need to use Outlook. Calendar Liberator exports in one direction only and never modifies your Outlook calendar.
Can I make the export run automatically?
No. The export only starts when you click Export calendar. To run it automatically, there would need to be a way to access your work account without you being in front of the browser, for example through Microsoft's APIs or credentials stored on a server. Calendar Liberator avoids all of that and only reads the Outlook page you already have open.
If I delete an event from my phone's calendar, does it disappear from Outlook too?
No. The export is one-way. If you imported the file and delete an event from your phone's calendar, the event remains in Outlook and will reappear the next time you export. If you've subscribed to the published calendar instead, the app treats it as a read-only calendar.
How many days of calendar events are exported?
Always 28: the 7 days before the day you export and the following 21 days, roughly covering last week, this week, and the next two weeks. It's a rolling window, not an archive that keeps growing: each export replaces the previous file, so events older than a week drop off the calendar on your phone and don't accumulate over time. The range can't be changed for now.
How often does the Outlook work calendar update on iPhone?
It depends on when you export the calendar and how often the app checks the published address. On macOS you can set it to update every 15 minutes, while on iOS it depends on the Fetch New Data setting. Google Calendar handles external calendars on its own schedule, often taking several hours.
Does the export work if Outlook isn't in English?
Not yet. Calendar Liberator identifies events through the text labels in Outlook's interface, which currently need to be in English. If you use Outlook in another language, switch it to English before exporting: the rest of your system and the calendar on your phone can stay in whatever language you prefer.
Who can see my published calendar?
Anyone who knows the read URL. Calendar apps cannot authenticate with a token when downloading a subscribed calendar, so the URL itself has to be treated as a secret. That's why a long random string is used. If you think someone has obtained the link, you can generate a new one and subscribe your devices again.
Does it cost anything to use Cloudflare to publish the calendar?
For personal use, no: an .ics file is only a few kilobytes, and the free Workers and R2 plans are more than enough. Calendar Liberator is also free and open source.